Unlock the Secrets to Selecting the Perfect Grill Timer for Exceptional Culinary Creations
Grilling transcends mere cooking; it is a sophisticated art form that requires not only skill but also a keen focus on precision and detail. A reliable grill timer emerges as one of the most essential tools in your culinary arsenal. With the right timer in hand, you can guarantee that every cut of meat and every selection of vegetable is flawlessly cooked, resulting in a memorable culinary experience for you and your guests. This extensive guide is designed to help you navigate the process of choosing the perfect grill timer tailored specifically to your grilling needs, ultimately elevating your cooking skills and outcomes dramatically.
Dive into the Different Types of Grill Timers to Elevate Your Cooking Skills

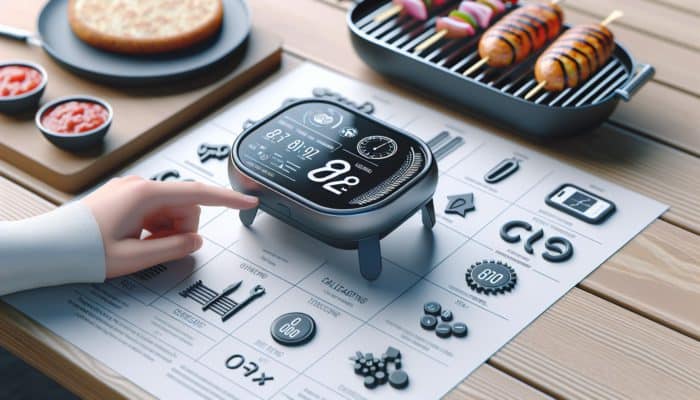
When it comes to selecting a grill timer, understanding the diverse range of options on the market is essential. Mechanical timers are typically user-friendly and uncomplicated, featuring straightforward dials that facilitate swift time adjustments. Renowned for their durability, these timers do not rely on batteries, making them a trustworthy choice for avid outdoor grilling fans. On the other hand, digital timers come equipped with advanced functionalities, such as countdown timers and customisable settings tailored to various food types. Many digital models are also designed with magnetic backs, allowing for convenient attachment to your grill or refrigerator, ensuring quick access during the cooking process.
For those who embrace technology, app-based timers are gaining traction. These innovative devices connect seamlessly to your smartphone, offering real-time alerts and updates about your cooking progress. With features like temperature sensors and remote monitoring capabilities, app-based timers significantly enhance the grilling experience, enabling multitasking without losing track of your meal. This modern solution caters to busy grillers who wish to ensure their food is cooked to perfection while juggling other tasks.
Essential Features to Consider When Selecting Your Perfect Grill Timer
It is vital to recognise that grill timers vary widely in their features. When making your selection, focus on crucial functionalities such as countdown, count-up, and the ability to set multiple alarms. A countdown timer is particularly advantageous for precisely managing cooking times, ensuring that your steak reaches the desired doneness without slipping into overcooked territory. Count-up timers are especially useful for tracking lengthy cooking durations, such as for brisket or ribs, providing you with an accurate measure of cooking time.
Additionally, having multiple alarm settings allows you to program different cooking times for various foods simultaneously. This feature proves invaluable when grilling a mixed selection of meats and vegetables, ensuring that all items finish cooking at the same time. Look for timers that deliver clear audio alerts, vibration options, or even visual indicators to ensure you never miss the signal, thereby enhancing your overall grilling experience.
Budget-Friendly Grill Timer Options for Savvy Grillers
Grilling enthusiasts need not break the bank to acquire a dependable grill timer. A multitude of cost-effective options provide reliable performance without compromising on essential features. Numerous high-quality mechanical and digital timers are available for under $20. When searching for a timer, take the time to read customer reviews and choose brands renowned for their durability and accuracy. By investing in a quality timer, you can significantly enrich your grilling experience without straining your budget.
Ensuring Simple Operation and Quick Setup for Your Grill Timer
A complicated grill timer can easily turn a delightful grilling experience into a frustrating ordeal. Therefore, it is wise to opt for timers that feature user-friendly interfaces requiring minimal effort for setup. Timers equipped with large, easy-to-read displays and intuitive buttons will save you valuable time and hassle, allowing you to concentrate on monitoring your food.
Equally important is considering the portability of the timer. A compact, lightweight design is ideal for easy transport during tailgating or camping trips. Ensure that the timer can be swiftly set up and accessed without diverting your attention from the grill, thereby maintaining a seamless and enjoyable cooking experience.
Choosing a Durable and Weather-Resistant Grill Timer for Outdoor Use
Since grilling often occurs outdoors, exposing your equipment to various weather elements, selecting a grill timer that is both sturdy and weather-resistant is crucial. Look for timers constructed from durable materials capable of withstanding the elements, such as high-quality plastics or stainless steel. Timers with water-resistant features will shield against accidental splashes or rain, ensuring your device remains functional and dependable. A robust grill timer should match the resilience of the grilling experience itself, providing longevity and consistent performance in all conditions.
A Comprehensive Guide to Setting Up Your Grill Timer for Optimal Cooking
Properly configuring your grill timer is vital for achieving flawless cooking results and ensuring that your food is cooked to perfection. This section offers an in-depth, step-by-step guide for calibrating, positioning, and programming your timer to suit a variety of food types.
Calibrating Your Timer for Precise and Reliable Readings

Before igniting the grill, it is imperative to ensure that your timer is accurately calibrated. Calibration methods may differ by model; therefore, always consult the manufacturer’s guidelines for specific instructions. While many digital timers come pre-calibrated, verifying their accuracy is advisable. To check, set the timer for a specific duration, like 10 minutes, and see if it alerts you as expected. If you notice any discrepancies, make adjustments according to the provided instructions to ensure optimal performance.
By confirming that your timer is calibrated accurately, you can prevent significant cooking mishaps, such as undercooking or overcooking your delectable meal. Taking the time to verify your timer’s accuracy before each grilling session will yield the best possible results, allowing you to serve perfectly cooked dishes with confidence.
Strategically Placing Your Grill Timer for Maximum Efficiency
The placement of your grill timer can profoundly influence your grilling efficiency and overall cooking experience. Position the timer in a spot that is not only easily visible but also readily accessible throughout the cooking process. Many grillers find it helpful to place the timer at eye level or within arm’s reach, enabling quick glances without stepping away from the grill.
Utilising the magnetic backs of digital timers to attach them to your grill or setting up a small stand on your prep table can be beneficial. Ensure that the timer is shielded from direct heat or flames, as prolonged exposure can damage the device and impair its functionality. By strategically positioning your timer, you can enhance your grilling experience and maintain focus on your culinary masterpieces.
Programming Your Timer for Different Food Types to Achieve Perfect Results
Different foods require varied cooking times, making it essential to learn how to program your timer for each type of meat or vegetable you plan to grill. For instance, chicken breasts typically require 6-8 minutes per side, while burgers may need only 4-6 minutes. Effectively utilising your timer will help you achieve that perfect sear without the anxiety of burning or undercooking your food.
Consider creating a grilling cheat sheet that includes recommended cooking times for various foods, keeping it close to your grill timer for quick reference. By adhering to these time guidelines and programming your timer accordingly, you can eliminate the guesswork from grilling and focus on enjoying the outdoor culinary experience with family and friends.
Mastering Timing Techniques for a Variety of Meat Cuts
Perfecting the timing for various types of meat can significantly enhance your grilling experience and improve the flavour of your dishes. This section highlights specialised timing techniques aimed at achieving optimal results for different cuts of meat.
Grilling Steaks for Exceptional Flavour and Texture
Grilling the ideal steak is a coveted skill that can impress any guest and elevate your culinary reputation. The key to achieving your desired doneness—be it rare, medium, or well-done—lies in the precision of your timing. A general rule of thumb is to allocate 4-5 minutes per side for a 1-inch thick steak; however, utilising a grill timer can refine this process significantly.
For rare steaks, aim for an internal temperature of approximately 125°F, medium at 135°F, and well-done starting at 160°F. Use your grill timer to carefully monitor the cooking duration, ensuring you don’t accidentally overcook your meat. Additionally, consider employing a meat thermometer to double-check the internal temperature, underscoring the importance of precision in your grilling technique to achieve restaurant-quality results.
Grilling Chicken for Safety and Juiciness
Grilling chicken calls for strict adherence to cooking times, as poultry must be thoroughly cooked to avert any risk of foodborne illnesses. Typically, chicken breasts need to be grilled for about 6-8 minutes per side, whereas thighs and wings may require longer, approximately 10-12 minutes. Setting your grill timer accordingly is crucial, and always verify the internal temperature.
Chicken should reach a minimum internal temperature of 165°F to ensure safety. To avoid dryness, consider marinating your chicken beforehand or using a brine, which enhances flavour and moisture retention. A dependable timer guarantees your chicken is cooked to perfection while maintaining its juiciness, allowing you to serve a delicious and safe meal to your guests.
Perfecting the Timing for Grilling Pork Cuts
Pork is a highly versatile meat, but grilling it without a solid timing strategy can be challenging. Pork chops typically require 4-6 minutes per side, while ribs and larger cuts like pork shoulder benefit from slower cooking at lower temperatures. Utilising your grill timer can help you effectively monitor cooking times, particularly for larger cuts that may take several hours to become tender.
For pork, the USDA recommends a minimum internal temperature of 145°F, followed by a resting period of three minutes before serving. Using your timer not only assists in cooking but also alerts you when it’s time to allow the pork to rest, enhancing the flavour and tenderness of your dish. Pair your perfectly timed pork with a tangy barbecue sauce to elevate the flavour profile and delight your guests.
Roasting Lamb with Precision for Exceptional Results
Lamb is a delicacy that, when grilled correctly, offers a rich flavour and tender texture. Depending on the cut—be it a leg, rack, or chop—the cooking times can vary dramatically. For instance, lamb chops typically require about 4-5 minutes per side, while a leg of lamb may need up to 20-25 minutes per pound at 350°F.
Utilising a grill timer is especially beneficial for larger cuts, allowing you to meticulously track cooking times. Aim for an internal temperature of 145°F for medium rare and 160°F for medium. Proper timing will ensure beautifully roasted lamb that is juicy and flavourful, enhancing your outdoor dining experience.
Mastering Timing Techniques for Grilling Vegetables and Side Dishes
Grilling vegetables can significantly elevate their flavours and textures, yet timing is crucial for optimal results. This section provides timing techniques for grilling various vegetables and sides to ensure delightful outcomes.
Grilling Corn on the Cob for a Delectable Side Dish
Corn on the cob is a summer favourite, and achieving the right timing is essential for perfect results. Whether grilled in the husk or shucked, corn generally takes about 10-15 minutes over medium-high heat. If grilling in the husk, soak the corn for around 30 minutes beforehand to prevent burning.
Use your grill timer to keep track of the cooking time, flipping the ears every few minutes for even charring. After grilling, brush with butter and sprinkle with salt for a delightful side dish that complements any summer meal. By paying attention to timing, you can ensure that the corn is tender and bursting with flavour.
Effective Timing for Grilling a Variety of Vegetables
Different vegetables require varied grilling times to achieve that perfect char while maintaining tenderness. For example, bell peppers and zucchini typically take about 6-8 minutes, while asparagus may require only 4-5 minutes, depending on thickness. Utilizing your grill timer ensures you can coordinate cooking times effectively, allowing you to add vegetables at just the right moment.
Consider marinating your vegetables in olive oil, garlic, and herbs to elevate their flavour before grilling. Keep a close eye on them to prevent overcooking, ensuring they reach the ideal texture and taste. With the right timing, grilled vegetables can become a highlight of your meal.
Timing and Skewering Kebabs for Even Cooking
Kebabs are a fun and versatile grilling option, but timing is essential to ensure all components are cooked evenly. When assembling your skewers, account for the cooking times of each ingredient. For instance, cubed chicken or beef may take about 10-12 minutes, while vegetables like onions and bell peppers may require around 8-10 minutes.
Set your grill timer for the longest cooking ingredient to prevent overcooking the other items. Rotate the skewers periodically for even cooking, and utilise a meat thermometer to check internal temperatures, ensuring everything is fully cooked and safe to eat.
Expert Tips for Grilling Seafood with Perfect Timing
Grilling seafood can be a delightful culinary adventure, yet it presents unique timing challenges. This section explores the best timing techniques when grilling various seafood options to ensure that each dish is cooked to perfection.
Grilling Fish Fillets with Precision for Moistness
Fish fillets are delicate and can easily dry out if overcooked. For most fish, aim for approximately 5-6 minutes per side over medium heat, depending on thickness. A reliable grill timer is essential for monitoring these brief cooking times, helping you achieve perfectly flaky, moist fish that’s cooked just right.
Utilise a fish spatula for gentle handling, and consider marinating your fillets for added flavour. Aim for an internal temperature of 145°F to ensure your fish remains succulent and delicious. By adhering to timing guidelines, you can create seafood dishes that impress and satisfy your guests.
Perfect Timing for Grilling Shrimp and Scallops
Shrimp and scallops are quick-cooking seafood options that require precise timing to avoid a rubbery texture. Shrimp typically take about 2-3 minutes per side, while scallops require slightly longer, around 3-4 minutes. Use your grill timer to closely monitor cooking, paying attention to colour changes.
Both shrimp and scallops should turn opaque when cooked correctly, with ideal internal temperatures for shrimp at approximately 120°F and for scallops around 130°F. These seafood delicacies are best served immediately after grilling, ideally paired with a light sauce or fresh herbs to enhance their natural flavours.
Grilling Whole Fish for Stunning Presentation and Flavour
Grilling a whole fish can yield stunning results, but it requires meticulous monitoring to ensure even cooking. Depending on the size, whole fish can take anywhere from 20 to 30 minutes to cook thoroughly. Use your grill timer to track cooking times, and ensure you check for doneness by inserting a fork to see if the flesh flakes easily.
Consider stuffing the fish with fresh herbs and citrus to enhance flavour during grilling. Aim for an internal temperature of 145°F for optimal tenderness. Grilling whole fish not only presents beautifully but also provides a feast for the senses, making it a perfect centrepiece for your dining table.
Grilling Lobster Tails to Create an Indulgent Dish
Lobster tails represent a luxurious seafood delicacy that can be elevated through grilling. To achieve perfectly grilled lobster, heat your grill to medium-high. Each tail will typically take about 8-10 minutes, depending on size. Utilise your grill timer to prevent overcooking, as this can result in tough meat.
Look for a bright red colour and an internal temperature of 140°F for doneness. Basting lobster tails with melted butter and garlic while grilling enhances their flavour, creating an indulgent culinary experience that is sure to impress your guests and elevate any meal.
Timing for Grilling Clams and Mussels Safely
Grilling clams and mussels requires precise timing to ensure they open perfectly without overcooking. Generally, they take about 5-10 minutes on the grill. Use your timer to monitor cooking and remove them once they begin to open. Be sure to discard any that remain closed to maintain food safety and guarantee a delightful seafood experience.
For added flavour, consider marinating them before grilling or serving with a rich garlic butter sauce. Grilled clams and mussels can serve as an impressive starter or side dish, enriching your overall grilling experience and delighting your guests.
Utilising a Timer for Effective Indirect Grilling Techniques
Indirect grilling is an excellent method for cooking larger cuts of meat or infusing flavours through smoking. This section delves into how to effectively use a grill timer for indirect grilling techniques, ensuring optimal results.
Preparing Your Grill for Mastery in Indirect Cooking
To maximise the benefits of indirect grilling, proper setup of your grill is essential. This technique involves placing the heat source on one side of the grill while the food cooks on the opposite side. This arrangement allows for gentler cooking, which is ideal for larger cuts or smoking.
While preparing, consider employing a grill timer to monitor cooking times and ensure even results. Season your meats and position them in the indirect heat zone, checking periodically to maintain the optimal temperature throughout the cooking process.
Cooking Large Cuts with Precision for Tender Outcomes
Large cuts of meat, such as brisket or pork shoulder, greatly benefit from indirect grilling. These cuts typically require longer cooking times, often ranging from 1.5 hours to several hours, depending on size. Use your grill timer to effectively manage these extended cooking sessions and achieve consistent results.
These larger cuts can develop rich flavours and tenderness through slow cooking. Monitor the internal temperature closely; for pork, aim for about 190°F for optimal tenderness. Utilizing your grill timer is crucial to ensuring these larger cuts are cooked precisely without drying out, resulting in a satisfying and flavourful meal.
Smoking Meats with the Help of a Timer
Smoking meats elevates cooking to a new level, requiring precise timing and temperature control. Use your grill timer to manage various stages of the smoking process, particularly when introducing wood chips or adjusting heat levels. Different types of meat will require varying smoking times, generally ranging from 4 to 10 hours.
A reliable grill timer will help to ensure your meat absorbs the right amount of smoke flavour without becoming overwhelmingly bitter. By mastering smoking techniques and timing, you can create mouthwatering dishes that are sure to impress.
Monitoring Temperature for Optimal Cooking Outcomes
Using a grill timer to monitor temperature is essential for achieving optimal cooking results. Regularly check the grill’s internal temperature and adjust as necessary to maintain consistent heat. Many digital timers now come equipped with temperature probes that can alert you when your meat reaches the desired internal temperature.
This feature is particularly beneficial when grilling larger cuts or smoking, where maintaining temperature control is paramount. A steady temperature enhances cooking accuracy and ensures that your food is perfectly prepared, resulting in delicious meals every time.
Allowing Meat to Rest for Maximum Flavour and Succulence
After grilling, allowing meat to rest is vital for preserving flavour and moisture. Use your grill timer to remind you when to remove the meat from the grill and let it rest. Depending on the cut, resting times generally range from 5 to 30 minutes.
This resting period facilitates the redistribution of juices within the meat, enhancing its flavour and tenderness. By incorporating a timer into this process, you can ensure that your grilled meats achieve their full potential before serving, creating a memorable dining experience.
Essential Maintenance Tips to Keep Your Grill Timer in Optimal Condition
Like any kitchen tool, maintaining your grill timer is crucial for its longevity and reliability. This section outlines the best practices to keep your timer in peak condition, ensuring it serves you well for countless grilling seasons to come.
Cleaning Your Grill Timer for Peak Performance and Longevity
Regularly cleaning your grill timer is critical to guaranteeing its effective operation over time. Follow the manufacturer’s guidelines for cleaning, which typically involves a simple wipe-down with a damp cloth. Avoid using harsh chemicals that might damage the device or its components.
For digital timers, ensure that the buttons remain free from debris or grease, as buildup can impair performance. Keeping your timer clean not only enhances its longevity but also its accuracy, contributing to consistently perfect grilling results and a more enjoyable cooking experience.
Battery and Power Management for Reliable Performance
Effective battery management is essential to ensure your timer is always ready for action whenever you need it. If using a battery-operated timer, check and replace the batteries regularly, especially before significant grilling events or holidays. Many timers now offer rechargeable battery options, providing both convenience and eco-friendliness for the environmentally conscious griller.
For plug-in timers, ensure that the power source is reliable and protected from outdoor elements. This attention to detail will help prevent interruptions during your grilling sessions, enabling seamless cooking experiences and minimising frustration.
Proper Storage of Your Timer for Enhanced Longevity
When not in use, store your grill timer in a cool, dry location to protect it from humidity and potential damage. Consider designating a dedicated storage spot in your grill area or kitchen for easy access during the next grilling season. Proper storage will enhance your timer’s longevity and functionality, ensuring it is always ready for your next grilling adventure.
Regular maintenance, along with smart storage habits, will ensure your grill timer remains a dependable companion in your quest for perfect grilling results, helping you create delicious meals with ease.
Upgrading Your Timer for the Latest Features and Innovations
As grilling technology continues to advance, consider upgrading your grill timer if your needs evolve or if you desire more advanced features. Newer models often come equipped with enhanced functionalities such as Bluetooth connectivity, improved temperature monitoring, and more precise settings for various food types.
Investing in a high-quality, feature-rich timer can dramatically elevate your grilling experience, making it significantly easier to achieve perfection in all your culinary creations and ensuring that each meal is a triumph.
Frequently Asked Questions About Grill Timers and Their Use
Is a grill timer essential for successful grilling?
While a grill timer is not strictly necessary, it can significantly enhance your grilling experience by ensuring precise cooking times, preventing overcooking, and helping you achieve perfect doneness for all your grilled dishes.
What type of grill timer is best suited for my grilling requirements?
The best type of grill timer depends on your specific needs and preferences. Mechanical timers are straightforward and easy to operate, while digital and app-based timers offer advanced features for enhanced precision and convenience, catering to different grilling styles.
What is the proper method for cleaning my grill timer?
Clean your grill timer according to the manufacturer’s instructions, typically using a damp cloth to wipe the exterior and buttons, avoiding harsh chemicals that could damage the device and affect its performance.
How long should I grill chicken for optimal results?
Chicken breasts generally require 6-8 minutes per side over medium heat, while thighs and wings may necessitate longer cooking times. Always ensure that the internal temperature reaches 165°F for safe consumption to avoid any health risks.
What internal temperature should a steak reach for perfect doneness?
For steak, aim for an internal temperature of 125°F for rare, 135°F for medium, and 160°F for well-done. Employ a meat thermometer for accurate readings to ensure your steak is cooked to perfection.
Can I utilise a timer for indirect grilling techniques?
Absolutely! A grill timer is essential for managing cooking times in indirect grilling, especially for larger cuts that require extended cooking periods to achieve optimal flavour and tenderness.
How can I prevent overcooking fish on the grill?
Utilise a grill timer to closely monitor cooking times, typically 5-6 minutes per side for fish fillets, and aim for an internal temperature of 145°F to prevent overcooking and ensure a delicious outcome.
What is the best approach for grilling vegetables?
Different vegetables require diverse cooking times. Use your grill timer to manage these times effectively, ensuring a perfect char while retaining tenderness and enhancing flavours.
How should I store my grill timer when not in use?
Keep your grill timer in a cool, dry location when not in use, ideally in a designated storage spot in your grill area or kitchen for easy access during your next grilling session.
Are there any smart timers available for grilling?
Yes, many smart timers can connect to smartphones and offer advanced features such as temperature monitoring and notifications, significantly enhancing the grilling experience and providing valuable assistance for grillers.
Connect with us on Facebook for more grilling tips, techniques, and recipes!
The Article Using a Grill Timer for Perfect Results: A Guide appeared first on https://pitmastersarsenal.com
The Article Grill Timer Guide for Perfect Cooking Results Was Found On https://limitsofstrategy.com